Grafting is a wonderful technique that allows you to create a single plant by joining parts from two different plants. It’s commonly used in fruit tree propagation to combine the best characteristics of the rootstock and the scion. If you’re interested in learning how to graft trees correctly and efficiently, then you’re in the right place!

1. Choosing the Right Time for Grafting
The best time to graft is usually in late winter or early spring, just before the sap starts flowing (bud break). Grafting at this time allows the graft to heal and grow during the entire growing season. So, mark your calendar and plan accordingly!
2. Selecting Scion and Rootstock
To ensure a successful graft, it’s important to choose the right scion and rootstock.
Scion: Select a scion from a healthy and disease-free tree that is one year old. The scion should have 2-3 buds.
Rootstock: Make sure the rootstock is compatible with the scion and is healthy and well-established. The size of the rootstock can vary depending on the grafting method you plan to use.
3. Common Grafting Techniques
There are different grafting techniques to choose from, depending on your specific needs. Here are a few common ones:
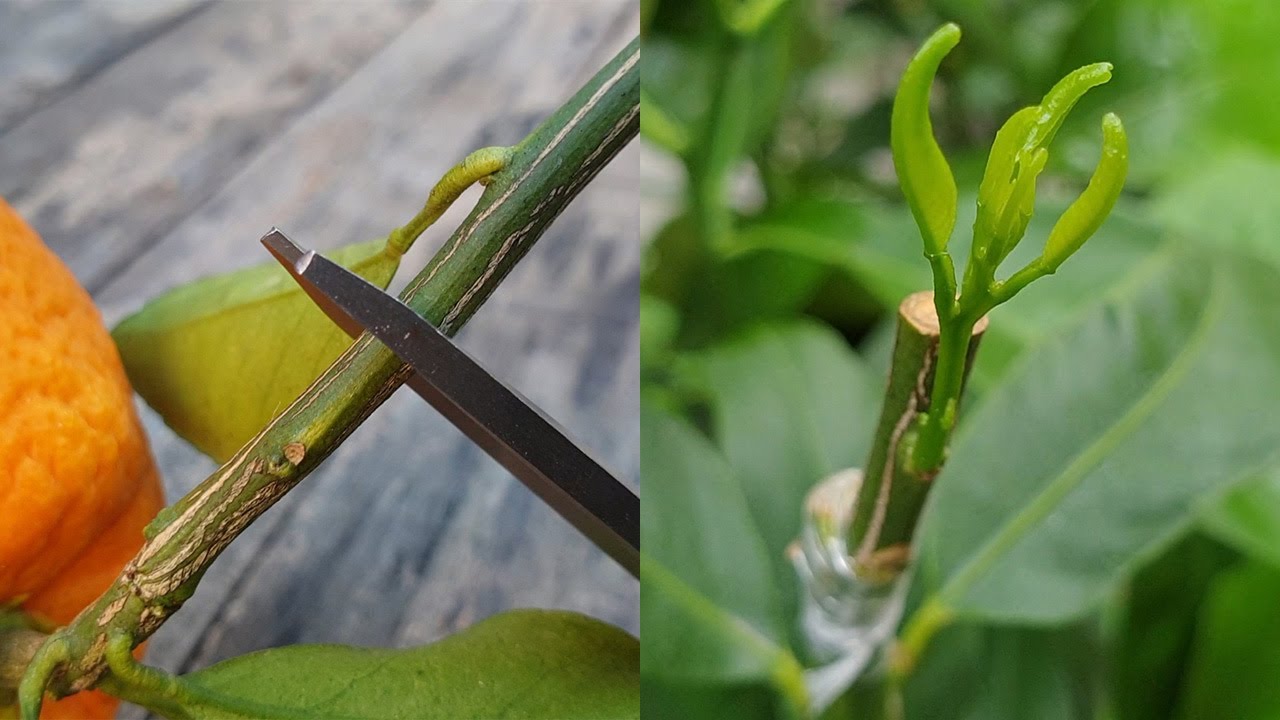
Whip Grafting: This technique works best when the rootstock and scion are similar in size. Make matching diagonal cuts on both the scion and rootstock, and join them so that the cambium layers (the green layer under the bark) meet.
Cleft Grafting: Ideal for larger rootstocks. Make a vertical cut in the rootstock and insert a scion with a wedge-shaped end into the slit.
Bud Grafting (Budding): This method involves inserting a bud into a cut in the rootstock. It is commonly used during the summer when buds are mature.
Take your time to choose the technique that suits your needs and follow the instructions carefully.
4. Grafting Under the Bark
Grafting under the bark is a technique perfect for large rootstocks and when the bark easily separates from the wood (usually in spring). Here’s how it’s done:
- Make a T-shaped cut in the bark of the rootstock.
- Carefully peel back the flaps of bark and insert the scion, which should have a few buds and a small piece of wood attached.
- Secure the scion in place, making sure it’s in contact with the cambium layer of the rootstock.

5. Aftercare of Grafts
Once the grafting is done, it’s important to provide proper care to ensure its success:
- Seal the graft with grafting wax or tape to prevent drying out.
- Water the graft appropriately and avoid fertilizing until the graft has fully taken.
- Keep a close eye on the graft for signs of growth or failure and adjust your care accordingly.
6. Tips for Success
Here are a few tips that can help increase your chances of success:
- Before grafting, sanitize all your tools properly to prevent the spread of diseases.
- Make clean and precise cuts to ensure good contact between the cambium layers.
- Label grafted plants for future reference. It will come in handy.
- Remember, patience is key. Some grafts may take time to establish, so don’t give up.
Grafting can be a truly rewarding process. It allows you to create unique combinations of fruit trees or repair damaged ones. Each grafting technique has its own advantages, and understanding them can help you choose the most suitable one for your specific needs. With a little practice and care, you’ll be able to witness successful and productive growth in your garden or orchard.
Remember, the secret ingredient in grafting is your love for plants, so have fun and enjoy the process!