Thuja, also known as arborvitae, is a stunning evergreen shrub that can add a touch of beauty to any landscape. If you want to expand your garden with more Thuja plants, propagating them from cuttings using aloe vera is a simple and effective method. In this step-by-step guide, we will show you how to propagate Thuja using aloe vera.

Materials Needed
Before you begin, gather the following materials:
- Healthy Thuja plant for taking cuttings.
- Aloe vera gel or fresh aloe vera leaf.
- Clean, sharp pruning shears or scissors.
- Small pots or containers.
- Potting mix or a mix of sand and peat.
- Rooting hormone (optional).
- Spray bottle.
- Clear plastic bags or plastic wrap.
- Rubber bands or string.
- A warm, well-lit area.
Step-by-Step Guide
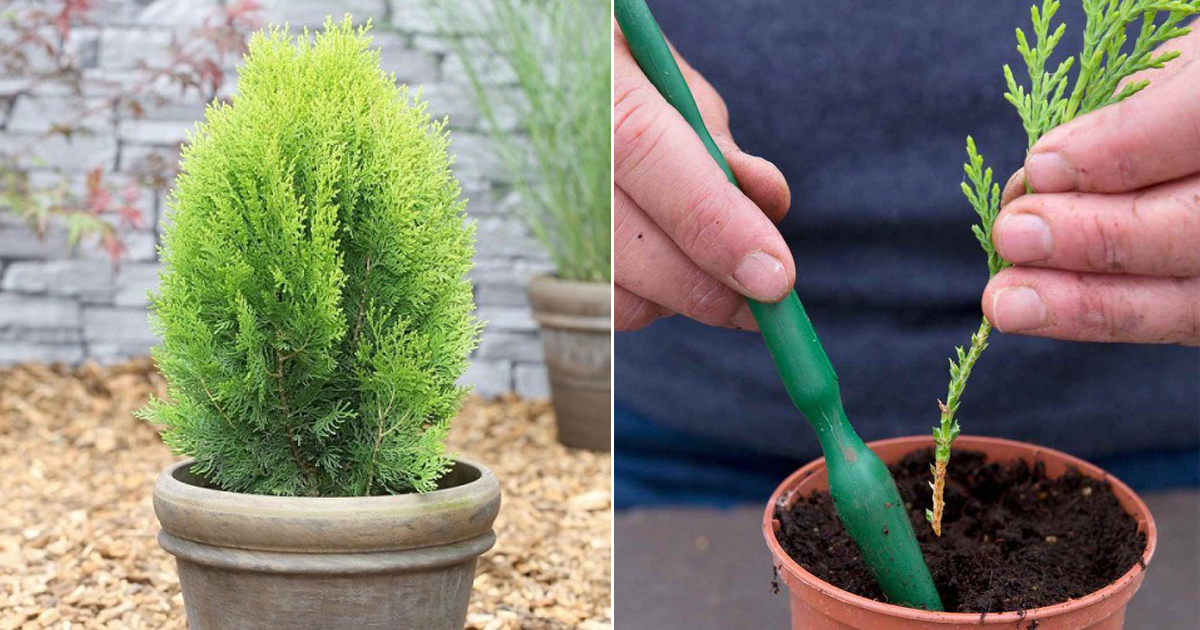
1. Select the Parent Plant: Choose a healthy and disease-free Thuja plant from which you’ll take the cuttings. It’s best to select softwood or semi-hardwood branches, typically in the spring or early summer.
2. Prepare Your Equipment: Ensure that your pruning shears or scissors are clean and sharp. This helps prevent the spread of diseases. You can sterilize them using rubbing alcohol or a 10% bleach solution.
3. Take Cuttings: Cut 4-6 inch long cuttings from the selected branches. Each cutting should have several leaves. Make a clean, angled cut just below a leaf node.
4. Prep the Aloe Vera: If you’re using fresh aloe vera, cut a leaf and collect the gel. Aloe vera gel contains natural rooting hormones and can help stimulate root growth. If using store-bought aloe vera gel, ensure it is pure and contains no additives.
5. Dip Cuttings in Aloe Vera: Gently dip the cut end of each Thuja cutting into the aloe vera gel or fresh aloe vera gel. This will help promote root development and protect against infection.
6. Optional Rooting Hormone (If Desired): You can also dip the cut end of the cutting into a rooting hormone powder before applying the aloe vera gel for additional root-promoting benefits.
7. Prepare the Potting Mix: Fill small pots or containers with a well-draining potting mix or a mixture of sand and peat. Water the mix until it’s evenly moist but not waterlogged.
8. Plant the Cuttings: Insert the treated cuttings into the prepared pots, making sure they are deep enough to keep them stable. You can plant multiple cuttings in the same container, keeping some space between them.
9. Create a Mini Greenhouse: To create a humid environment, place clear plastic bags or plastic wrap over the pots and secure them with rubber bands or string. This will help maintain high humidity levels for the cuttings.
10. Provide Adequate Light and Temperature: Place the pots in a warm, well-lit area with indirect sunlight. Ensure the temperature remains consistent, ideally between 65-75°F (18-24°C).
11. Maintain Moisture: Mist the cuttings with a spray bottle to keep the environment humid. Water the pots as needed to maintain consistent moisture but avoid overwatering.
12. Monitor and Wait: Be patient. Roots typically take several weeks to develop. You’ll know the cuttings have rooted when you gently tug on them, and they resist the pull.
13. Transplant: Once the cuttings have developed a healthy root system, they are ready to be transplanted into larger containers or directly into the garden.
Conclusion
Propagating Thuja using aloe vera is a natural and rewarding way to expand your garden with this beautiful evergreen shrub. By following this simple step-by-step guide, you can successfully propagate Thuja and enjoy the beauty it brings to your garden. Just remember to be patient, provide the right care, and soon enough, you’ll have thriving new Thuja plants in your garden.