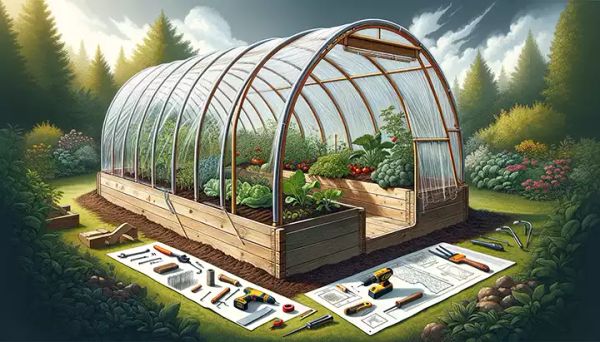
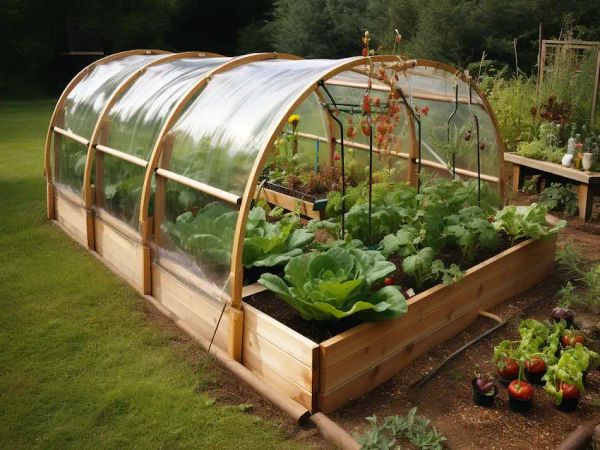
If you want to extend your growing season, protect your plants from harsh weather, and keep pests away, building a hinged hoophouse for your raised bed garden is a great idea. Don’t worry if you’re a beginner – this guide will walk you through the process step by step, so you can achieve excellent results.
Materials Needed:
- PVC pipes (1/2 inch diameter)
- Heavy-duty plastic sheeting (6 mil)
- Hinges
- Screws (stainless steel)
- Wooden planks (for the raised bed frame)
- Pipe clamps
- UV-resistant zip ties
- Tools: Drill, saw, measuring tape, staple gun
Step 1: Prepare Your Raised Bed
First, construct a sturdy raised bed using wooden planks. Make sure it is well-positioned in your garden, ideally in a spot that gets plenty of sunlight. The size of your raised bed will determine the dimensions of your hoophouse, so plan accordingly.
Step 2: Measure and Cut PVC Pipes
Measure the length of your raised bed and cut the PVC pipes accordingly. These pipes will create the hoops that span across the width of the bed.
The number of hoops you need depends on the length of your bed – aim for a hoop every 2-3 feet. Gently bend the pipes and insert the ends into the soil on either side of the bed or attach them to the wooden frame with pipe clamps to form arches.
Step 3: Install Hinges
Choose one side of the raised bed to be the fixed base of your hoophouse. On the opposite side, where the opening will be, attach hinges to the wooden frame. These hinges will allow your hoophouse to easily open and close for access to the plants.
Step 4: Attach PVC Pipes to Hinges
Secure the PVC pipes to the hinged side of the raised bed using screws and pipe clamps. Make sure the pipes are firmly attached and that the structure can swing open and close smoothly.
Step 5: Cover with Plastic Sheeting
Now, drape the heavy-duty plastic sheeting over the PVC hoops. Make sure there is enough excess to cover the ends of the raised bed. Trim the plastic as needed, leaving extra material for securing it to the ground or frame.
Step 6: Secure the Plastic Sheeting
To secure the plastic sheeting tightly to the PVC hoops, use UV-resistant zip ties. On the hinged side, staple the plastic to the wooden frame, ensuring it is taut and secure. On the fixed side and ends, bury the excess plastic in the soil or secure it to the frame. This will keep the interior protected from the elements.
Step 7: Final Adjustments
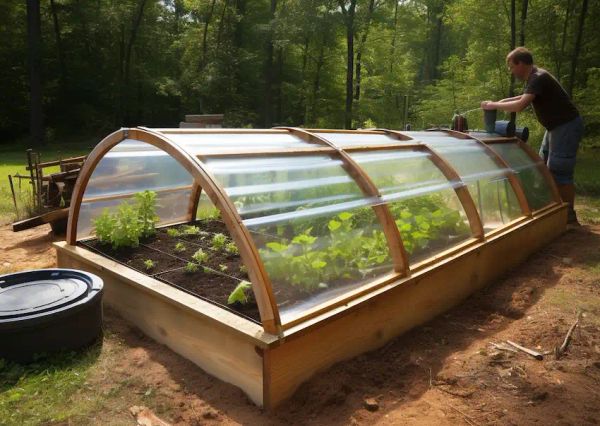
Test the hinged hoophouse by opening and closing it to ensure that the plastic is not overly stretched or loose. Make any necessary adjustments to the hinges, plastic, or frame to improve its functionality.
Step 8: Ventilation
To prevent overheating on sunny days, you can create ventilation in the hoophouse. You can do this by rolling up the side of the plastic sheeting or installing additional vents. This will help regulate the temperature and humidity inside the hoophouse.
Maintenance Tips:
Here are some maintenance tips to keep your hinged hoophouse in good condition:
- Regularly check the structure for any damage or wear, especially after severe weather conditions.
- Replace the plastic sheeting as needed to ensure it remains clear and durable.
- Periodically lubricate the hinges for smooth operation.
Building a hinged hoophouse for your raised bed garden is a rewarding project that can significantly benefit your plants. It provides them with a more controlled environment, helping you extend your growing season and protect your plants from pests. By following these detailed steps, you will create a functional and durable hoophouse that enhances your gardening experience.