If you’re looking for an easy and cost-effective way to conserve water and reduce your utility bills, building a rain barrel is the perfect solution. By collecting and storing rainwater, you can sustainably maintain your garden and enjoy all the benefits that come with it. In this step-by-step guide, we’ll walk you through the process of creating your own rain barrel.
Materials Needed:
Before we dive into the instructions, make sure you have the following materials on hand:
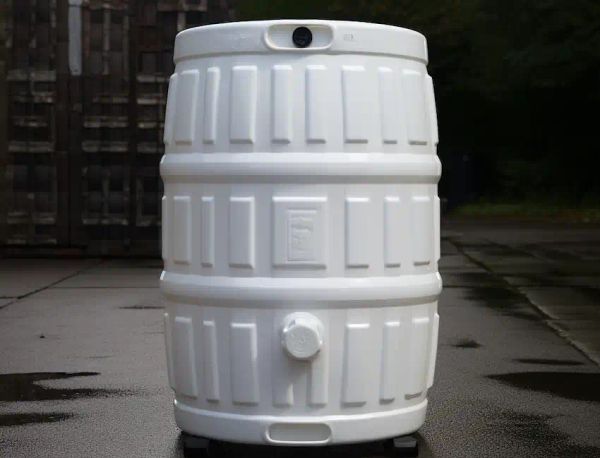
- A large barrel or drum: We recommend a 55-gallon plastic drum for this project.
- Spigot: This will allow you to access the water easily.
- Overflow valve: To handle any excess water.
- Mesh screen: This will keep debris and insects out of the barrel.
- Downspout diverter or flexible downspout: To direct water from your gutter into the barrel.
- Hose clamp: To secure the overflow valve and downspout.
- Silicone sealant: To waterproof the spigot and overflow connections.
- Drill and bits: You’ll need these to create holes in the barrel.
- Teflon tape: This will ensure a watertight seal on threads.
- Cinder blocks or a sturdy stand: To elevate the barrel.
Instructions:
Now that you have all the necessary materials, let’s get started with the instructions:
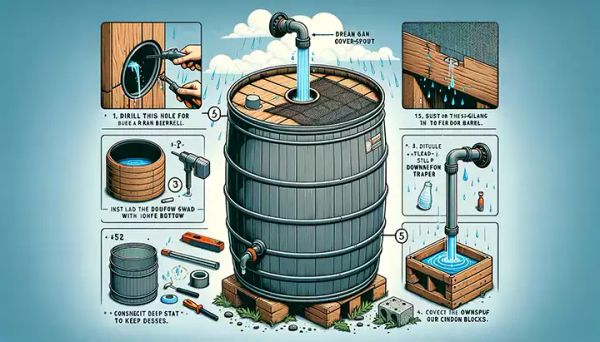
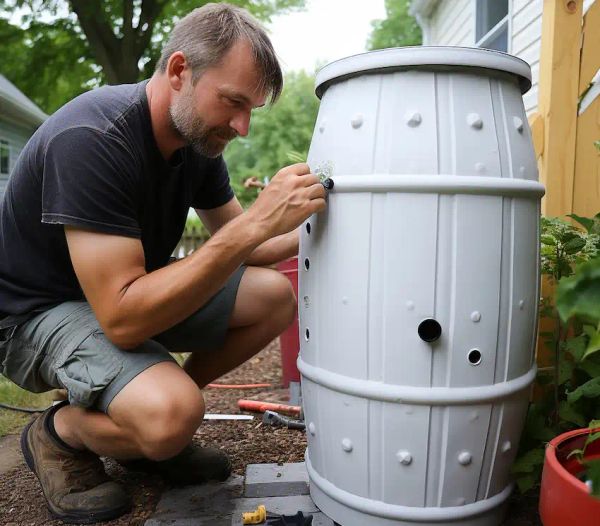
1. Prepare the Barrel:
Start by choosing a high-quality barrel that hasn’t housed harmful chemicals. Clean it thoroughly to ensure it’s ready for use.
2. Create the Spigot Hole:
- Positioning: Drill a hole for the spigot about 2-3 inches from the bottom of the barrel. This placement allows you to access most of the water while leaving room for sediment to settle.
- Sealing: Apply silicone sealant around the hole and screw the spigot into place. Use Teflon tape on the threads to ensure a leak-proof fit.
3. Install the Overflow Valve:
- Drill an Overflow Hole: Choose a spot near the top of the barrel to install the overflow valve. Drill a hole that matches the size of your overflow fitting.
- Attach the Valve: Apply silicone sealant around the hole and insert the overflow valve. Use a hose clamp to tighten its connection and secure it in place.
4. Attach the Mesh Screen:
- Cut the Screen: Measure and cut a piece of the mesh screen to cover the top opening of the barrel.
- Secure the Screen: Fit the screen over the opening and make sure it’s tight and secure. This mesh will keep out any debris and insects.
5. Set Up the Downspout:
- Position the Barrel: Find a solid and elevated base near a downspout where you can place your barrel. The elevation will increase water pressure and make accessing the spigot easier.
- Modify the Downspout: Cut your downspout at a height that allows it to feed directly into the top of your barrel. Use a downspout diverter or a flexible downspout to direct the rainwater into the barrel.
6. Secure and Maintain Your Rain Barrel:
- Check for Leaks: During a rainfall, inspect your barrel to ensure there are no leaks.
- Regular Maintenance: Periodically empty and clean the barrel to prevent algae growth and sediment accumulation. Also, make sure the mesh screen remains intact to keep out debris and insects.
Building a rain barrel is a straightforward project that yields significant benefits for both the environment and your garden. By following these steps, you can create a reliable rainwater harvesting system that conserves water, saves money, and promotes sustainable living. So, what are you waiting for? Get started and happy building!