
Growing turmeric, the golden spice known for its delicious flavor and health benefits, doesn’t have to be limited by your location. Whether you’re in a warm or cold zone, you can easily grow turmeric in containers and enjoy its aromatic goodness. Here’s a simple guide to help you grow turmeric in containers, no matter where you are.
Step 1: Choosing Your Turmeric Rhizomes
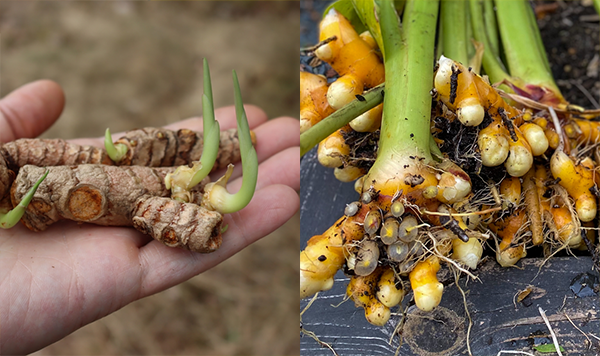
Start by getting healthy and fresh turmeric rhizomes from your local garden center or organic grocery store. Look for plump rhizomes with buds or eyes, as these are the points from which shoots will grow.
Step 2: Selecting the Right Container
Turmeric plants can grow up to 3 feet tall and have large leaves, so it’s important to choose a large container. Aim for a container that is at least 12 inches deep and 12-18 inches in diameter. Make sure the container has drainage holes to prevent waterlogging.
Step 3: Preparing the Soil
Create a well-draining environment for your turmeric by using an organic-rich potting mix. You can also add some organic compost or well-rotted manure to enrich the soil and provide essential nutrients for the growing plants.
Step 4: Planting the Rhizomes
Plant the turmeric rhizomes about 2 inches deep in the soil with the buds facing up. If your container is spacious enough, you can plant multiple rhizomes, keeping them at least 6 inches apart.

Step 5: Providing Optimal Growing Conditions
Turmeric thrives in warm and humid conditions, so place your container in a spot where it can receive 4-6 hours of indirect sunlight every day. Keep the soil consistently moist, but avoid overwatering. The ideal temperature range for turmeric growth is between 68-86°F (20-30°C).
Step 6: Caring for the Turmeric Plant
Take good care of your turmeric plant to ensure healthy growth:
- Watering: Keep the soil consistently moist, particularly during the growing season.
- Fertilization: Feed the plant with an all-purpose organic fertilizer every 4-6 weeks while it’s growing.
- Pruning: Regularly remove any yellowing or dead leaves to encourage new and healthy growth.
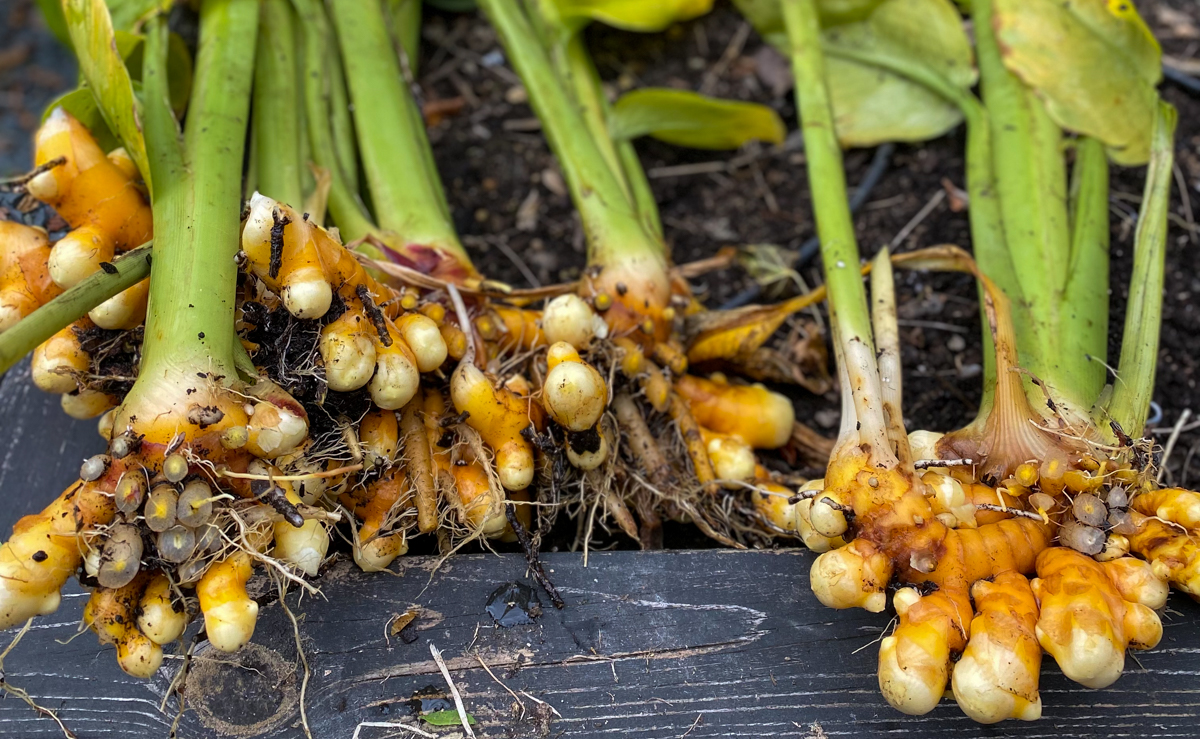
Step 7: Harvesting Your Turmeric
Turmeric usually takes 7-10 months to mature. Once you see the leaves and stems turning brown and drying, it’s time to harvest. Carefully remove the soil around the base of the plant and extract the rhizomes. Wash them thoroughly and let them dry.
Step 8: Curing and Storing
After harvesting, boil the turmeric rhizomes for 45 minutes, and then dry them in a well-ventilated, shaded area for at least a week. Once dry, you can store the rhizomes in a cool, dark place or grind them into a fine powder for use in your culinary creations.

Step 9: Overwintering
If you live in a colder zone, bring your containers indoors when the temperature drops below 50°F (10°C). Make sure to provide light and water, and your turmeric plant can continue to thrive even during the winter months.
Growing turmeric in containers is an accessible way to enjoy this wonderful spice regardless of where you live. By following these simple steps and providing the right conditions, you can savor the flavors of homegrown turmeric in your favorite dishes. Whether you’re an experienced gardener or a beginner, this guide will help you embark on a successful turmeric growing journey and reap the rewards of your efforts in your culinary creations.